After having the internal HDD in my Cloud Key Gen2 fail on me I looked at upgrade options. There are not many alternatives for NAS / Surveillance drives like the WD purple in the 2.5″ form factor.
I don’t know what ultimately killed the drive, the unit is located in the attic of the house where it gets both hot in the summer and cold in the winter. Not an ideal environment, but since space is limited it’s where the servers have to be. Before the winter comes I will try to have a more controlled environment for some of the devices that are more sensitive to low temperatures. More on that in an upcoming post.
While looking for a replacement I soon discarded the idea of SSD drives. A lot of information suggest that they struggle when it comes to the massive writes that these disks have to handle and that the life span is not great because of this. There are enterprise drives that might be a good choice, but they are very expensive. An alternative was to buy a 3TB SSD drive and just see how long it would survive and be done with it for now. But it seemed less than ideal.
I knew that Western Digital provide drives rated for surveillance use and that’s what I wanted to go with. My choice landed on a 3TB Western Digital Purple drive. I have 5 (1080p) cameras and this capacity will enable me to retain videos for a month with all cameras recording continuously. Obviously these drives do not come in a 2.5″ form factor so this solution is not pretty aesthetically. For me, this is not an issue since the devices are all located in the attic and the benefit of being able to use a WD Purple far outweighs the downsides.
My material list:
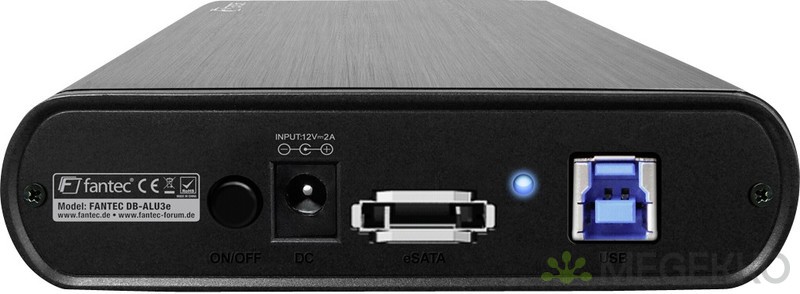
- An external HDD case with an external PSU with an eSATA port
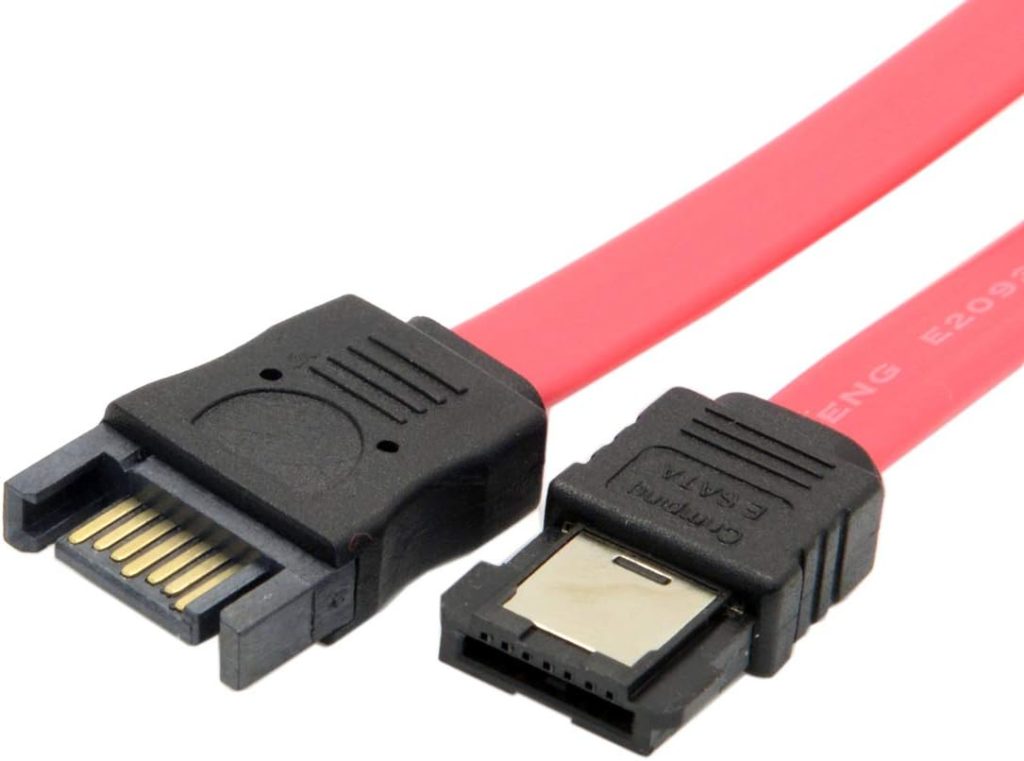
- A eSATA female to SATA male cable
- A 3.5″ WD Purple 3TB
 |  |
Most external hard drive cases use USB. I wanted to keep it as simple as possible and go SATA all the way. eSATA to SATA is just a simple cable without any conversions going on and it works great.
All I did was remove the 2.5″ internal hard drive, the cradle and insert the male SATA cable into the Cloud Key. It’s not locked into the connector or anything, so it’s very easy to pull out by accident. For an upgraded version I would 3D print a replacement for the cradle that the cable can be attached to and when it’s inserted it would lock into place. This way you’d be less likely to accidentally rip out the cable.
Monitoring temperature
After replacing the drive I wanted to monitor the temperature of it. I wanted to have this data available in Home Assistant to be able to trigger certain automations based on this. It’s been kinda warm this June of 2023 so I got a cheap table fan pointing at the electronics that will turn on over a certain threshold.
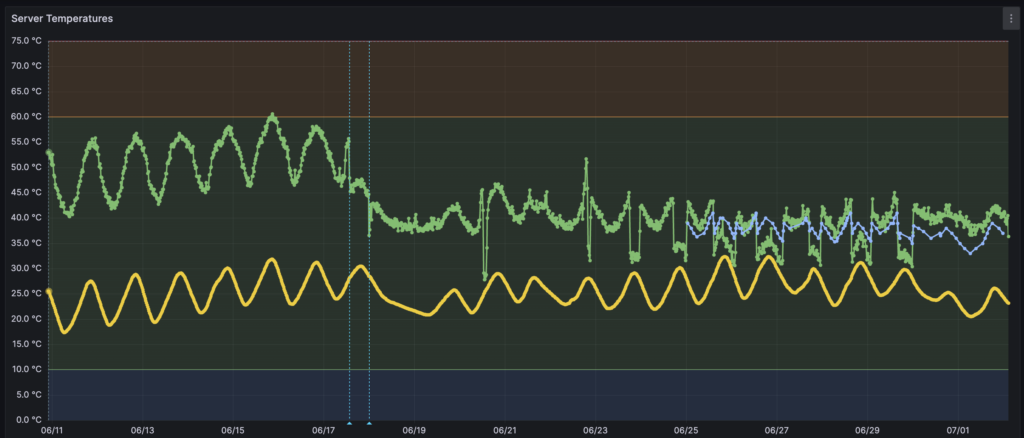
I have been measuring the temperature of my Proxmox server and the ambient temperature in the attic for a long time. Here is a graph.

The yellow line is the ambient temperature. On hot days it can climb to over 32 degrees. At the 2 thin vertical lines I changed the server (a thin client that has a vertical stand) position from being flat on the table to a vertical position. This helped a lot with lowering the temperature! (The server is the green line).
But I digress, the hard drive temperature is the blue line. A few days before the blue line begins I installed the fan. You can see that it really shaves the tops of the server and hard drive temperatures when it kicks in at >28 degrees ambient. Success!
So how did I get the temperature into Home Assistant?
You need to enable SSH login to the Cloud Key. You do this in the console settings, under “Advanced”. You need to be careful messing around with the Linux system that drives the console and heed the warnings about potentially bricking your unit.
I started by making a script that uses smartctl for fetching the temperature and then jq to parse it out. Next I used mosquitto_pub to send the data to my MQTT server. First you need to install the applications used:
apt get install jq mosquitto-clientsThen you need to create this script, called temp.sh in the /root folder:
#!/bin/bash
temperature=$(/usr/sbin/smartctl --all /dev/sda -j | jq 'select(.ata_smart_attributes).temperature.current')
mosquitto_pub -h <mqtt server ip> -t <mqtt topic> -m "$temperature"
You need to enter your MQTT server IP and the topic you want MQTT to post to. After that you can make a sensor in Home Assistant. You can have a look at the documentation for guidance.
Lastly you need to use cron to execute this script every minute. You do this by:
crontab -eYou will now enter the crontab file where you add this row at the bottom on a new line:
* * * * /root/temp.shIf everything went well, this script will now post the hard drive temperature to your MQTT server! There might be some adjustments you need to do, but generally this is how I did it. If you have any trouble or have questions, just let me know in the comments!